Thursday 2 June 2016

The Containment Lab

I’ve been working on an environment for a while now since I finished the Resonator at the end of February. However I’m considering diverting my attention to something smaller for a month or so, so now would be as good a time as any to go over my progress so far.

Admittedly I did write an entry on this project a couple of months back in its entirety but I decided to scrap it because it was just a bit rubbish. So surprise! I haven’t been slacking off after all!

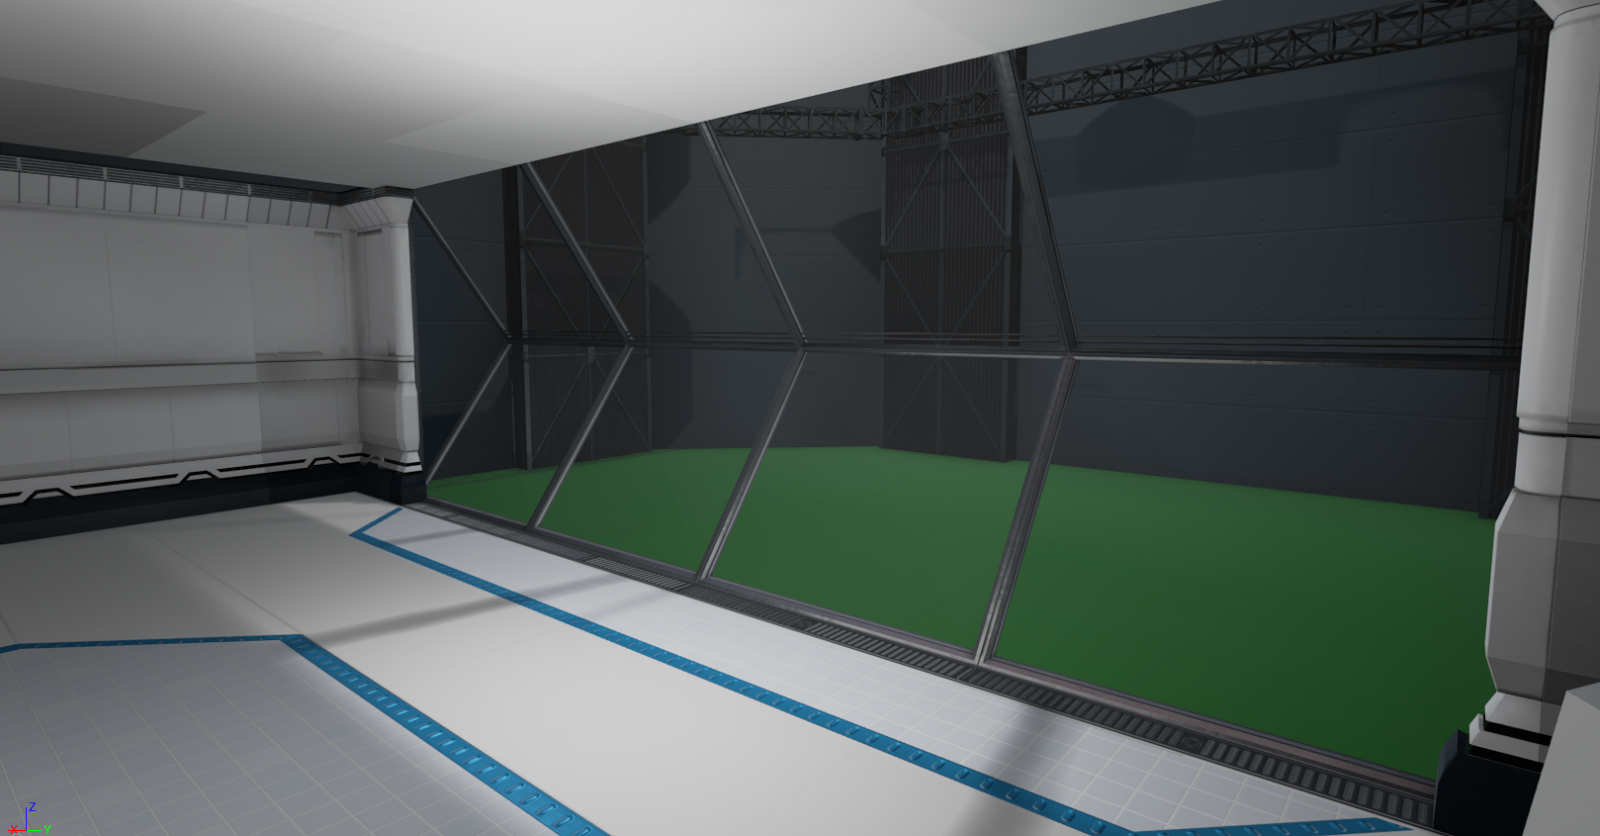
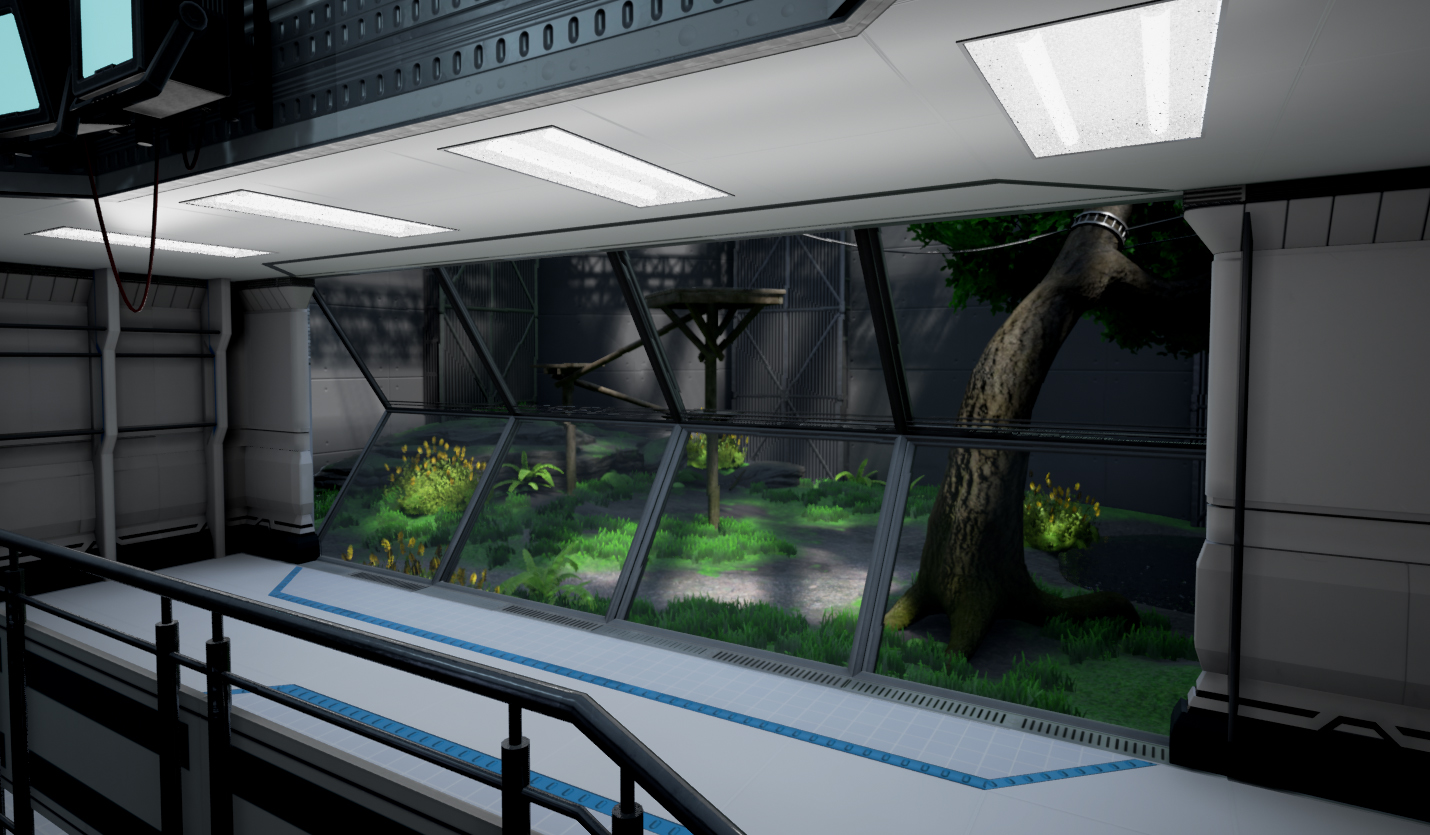
With this project I wanted to create some kind of containment facility for an exotic or dangerous creature. The driving image I wanted to work towards was that of the view out the angular window. The architecture of the lab would be clean and light, with a simple modern or near future theme so as not to distract from the focal point of the scene.

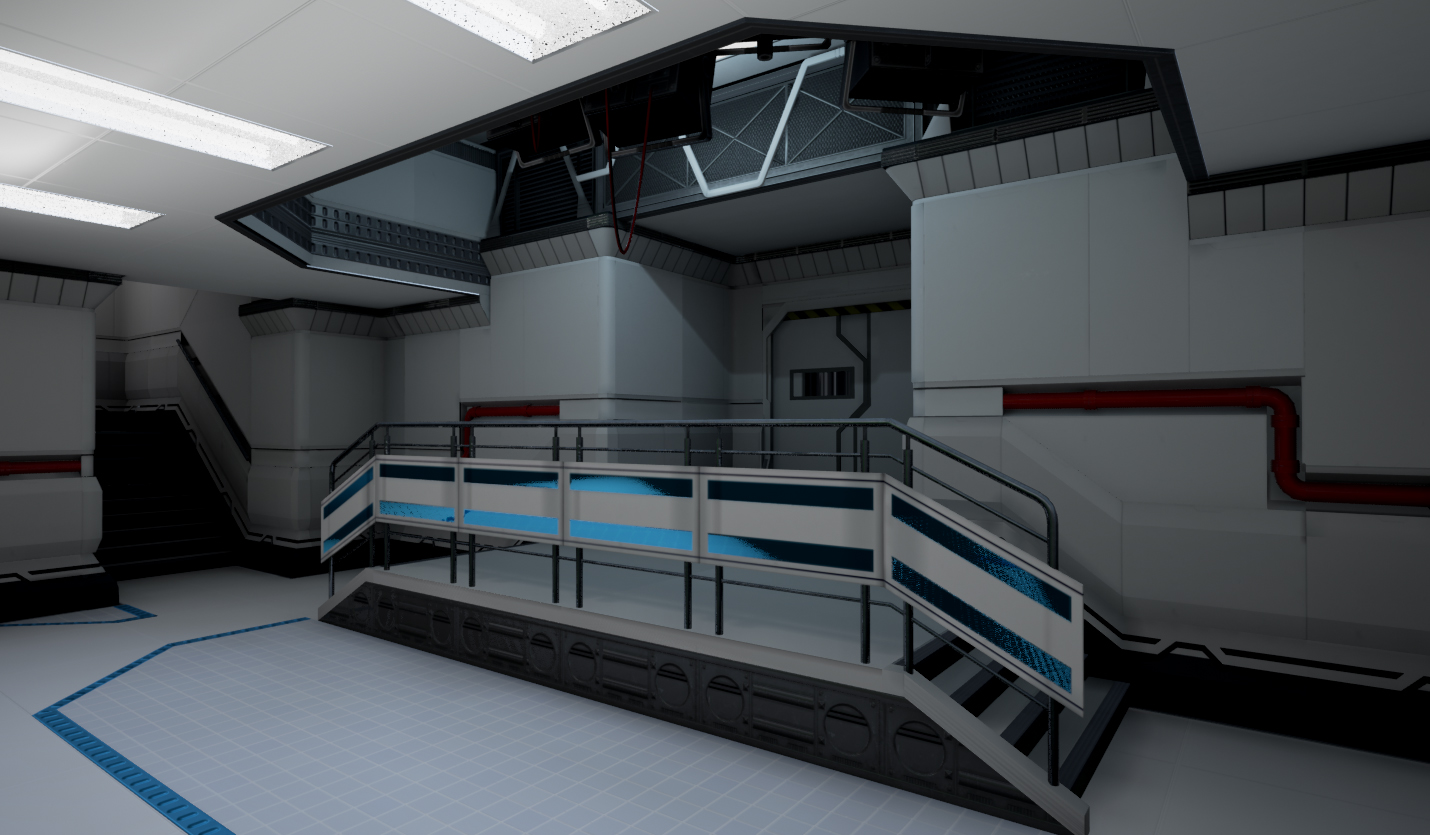
The ultimate goal of the project was, of course, to potentially be able to replace my Offworld Safehouse FMP in my portfolio, which looked good from a distance but was sorely lacking in showing off my technical skills in almost every regard. This level was going to feature modular building elements and an area of greenery, which would be kept on a small scale so I could really focus on the little details.


The start of the project was very slow due to not having produced modular assets before, resulting in a somewhat trial-and-error approach to texture efficiency. Once I understood the importance of modular textures over modular meshes things started moving much faster. It’s tempting to go back and re-bake some of my maps differently as there are still some issues but that would probably be a poor use of my time. As for the greenery I still had some problems and I’m still not 100% satisfied with the assets I’ve made so far but with the help of the new foliage material settings in UE4 things are looking far better than in my FMP.


At the stage I am at now, most parts of the build have been touched upon but aren’t quite there yet. I haven’t properly worked on the enclosure facing/outer walls of the lab at all, so they will likely be the next aspect I concentrate on. I’m also quite concerned about the emptiness of the lab room so I need to think up some props to populate more and also to sell the “story” better, as I think my theme still comes across as quite vague and not immediately obvious.


Ultimately this project still needs a lot of work, but I think it’s a good idea to take a brief rest and work on something a little different. After working solo on one thing for an extended period of time without access to immediate feedback like at university it starts to become increasingly more difficult to tell what looks good or not, a fresher perspective would definitely be nice. Plus, my self-imposed “deadline” for getting my portfolio up to scratch is still Industry Workshops in August, and I wanted to get more than one piece done by that time. Focusing on the smaller idea to get it out of the way first doesn’t seem like a bad idea to me.

The “mini project” I’m considering taking on would be to compensate for the remaining shortcomings of my portfolio. I need to include something that is more grounded, less futuristic or fantastical. Possibly something historical to balance things out. But I’ll be keeping it on a very small scale regardless, and focusing on individual assets rather than just the finished composition.

As for the specifics, my current best idea is to make an ornamental fireplace, something that is interesting enough to stand on its own but would also make a great hero asset in a small scene. That way I could call the project “done” but easily be able to return to and expand on it later. It should be pretty fun.

Wednesday 24 February 2016

Getting the Momentum Going Again

It has been a while since I posted last.

To give a bit of an explanation why- Shortly after my previous post I successfully acquired a part-time job, which I sorely needed. However not long after that there were some problems resulting in me being forced to work essentially full time. That combined with some personal issues and the general misery of the pre-Christmas period, and my work completely ground to a halt.
By January I knew I needed to do something to pull me out of the rut. I decided to put the money I’d earned doing all those extra hours towards my art, just to make it feel like it was all worth something. It’d long been a goal to buy myself a laptop to work on my art anywhere I wanted, but I decided to take it one step further and buy myself a surface Pro 4.

I won’t go into a full review but I’m quite pleased with the performance, it is very enjoyable to use with Zbrush or Photoshop. My main gripes would be the slight delay when starting a stroke in Photoshop, and the hold to right click function getting in the way of painting small dots. This can’t be disabled or the program will start bugging out. If you buy one of these you’ll be having a lot of fun wrangling drivers before you can get cracking!

But that investment gave me the boost I needed, and I started wanting to work again as sculpting directly on the screen definitely feels more intuitive to me. Then my workplace finally got its act together and started reducing my hours back to how they had been. With things looking up it began to positively affect the rest of my life too, and right now I feel more driven than I have in a long time.

I still need to work very hard if I’m going to get my portfolio to a state I’m happy with by the end of summer but I have plans and it’s definitely achievable.

Update-Wildstar Resonator Project

 I finally got around to finishing the sculpt after a fair bit of trial and error, trying to work out how to model obscured or less defined parts of the concept. The tri count of the finished piece was stupidly high so decimating had to be done piece by piece.


Once that was done I had to create the low poly. There were some asymmetrical parts and others that needed to be symmetrically duplicated so I had to pay attention. I was worried I was going to end up with it being far too high poly- the result was a little under 4,400 tris, though not knowing the average tri counts from the other weapons in game I can’t be sure how this stands. I don’t think I could’ve gone much lower without losing a lot of the form.

Unwrapping wasn’t too difficult, maybe there could’ve been some changes with my bake in mind but for a fairly small asset I feel it was adequate. After tweaking the smoothing groups a bit I started trying to bake. I used xNormal, first without a pre-generated cage. Then I made a cage in Max and imported that. I edited both together to make sure I got the best parts of each. I was going to bake in Max too, but found out it had been a mistake to use the cage modifier manually- the cage reset every time I selected the high poly and I couldn’t find a way around it, and it wasn’t going to be a good use of time to remake the cage again so I chose to move on.


Then it finally came to the main challenge of this project- the stylised texture. I used the normal map to generate a rough AO to use as a guide, then got stuck in. My general rule of thumb at the start was to lighten outer edges and darker inner ones, then start adding some shading and gradients to highlight the forms. I kept having to go back to different reference images to make sure I was doing exactly what the game does- I was unsure whether to add shine highlights and what style to do them in at the start, but later found better reference to guide me.


My current model is starting to look complete, but it needs some finishing touches first. I’ve gotten some advice from some helpful users on Polycount as to what I’m missing, so I have a clear path as to how to get my stylisation looking accurate.

--

Once I am done with this model I’ll be concepting for my next project, which will most likely be a small environment piece that will make up for the shortcomings of my FMP.  I have a vague idea of what I’d like to do, but I’ll leave that for the next time. 

Monday 7 September 2015

The Big Recap Super Post

I have decided to start fresh.

My previous blog(s) were very rigid and academic, possibly too much so. I want to make this just a little bit more freeform.
Don’t get me wrong, with this blog I still want to keep my 3D work as the main focus, but sometimes I also want to touch on related subjects just to keep things interesting, and give a little more insight into different ways I am developing or applying my skills. Now that I have graduated I have the freedom to be this flexible… We’ll see if this is a mistake further down the line.

First thing to mention before I get ahead of myself- I recently remade my portfolio on a better site (i.e. the one everyone else uses) so please check it out if you have the time to spare. Criticism is very welcome.

So, since I finished University a couple of months ago a fair bit of my time has been spent playing Wildstar, an MMO with stylised visuals that I first got into just over a year ago. I’m making a point to mention this due to what has ended up being a slight trend in theme with the two projects I’m about to talk about- consider this a disclaimer!

3D Portfolio Project- Wildstar Toaster Resonator

I chose to create an object using this game’s art because I’d never before worked on something so stylised. This is a piece of concept art that I knew was never used in the game as it was part of a public vote and did not win, so I could practice working from a concept without the ability to copy from an existing model.


In addition to all this, the project also became my first foray into using hard-edge modelling techniques in Zbrush, but I started by blocking out the different elements of the design in Max to get the proportions right. Having knowledge of the game presented me with an interesting predicament right off the bat- These kinds of weapon are always taller than they are long, as they are based on shock paddles. I didn’t want to stray from the concept too much though so I tried to settle on a nice looking middle-ground. Another issue was what to do to fill in areas I couldn’t work out from the concept or weren’t physically possible without compromising symmetry. All I could do with this was use my artistic license and improvise on the design. Once I was happy I chamfered the sharp edges and threw it into Zbrush.


For this stage I started with the handle since it needed a lot of work, splitting the piece off to another subtool first. What I found worked best was to sculpt masked areas and then retopologise and make adaptive skins to replace them with smoother shapes. Using polygroups and creasing the edges helped in making curved sections. For details such as the cross-hatched pattern on the handle I used Projection Master, another tool new to me. I see myself using this tool a lot in the future; it has been super handy for drawing in panel lines and embossing shapes.

For some details that were too small to bother with at the start or I’d just plain forgotten, I had to append extra shapes. This included using ZSpheres to draw in the smaller wire at the back of the gun. For this I smoothed out the resulting mesh to get a slightly more blobby, cartoonish feel.


Now that I’m getting comfortable I’ve started work on the front of the weapon. What I’m really finding helpful is the ability to subtract one mesh from another using Dynamesh. It’s much more simple than using the same thing in Max, though I have had some issues cutting out concave shapes, none of which I couldn’t fix. I’ve just recently sculpted the rings on (what I assume are supposed to be) the pancakes. It’s been difficult working out how to deal with spherical shapes in this style, as they theoretically should be blobby and irregular like the rest of the art style but from observation of other hard-edge props from the game they usually are normal. With this in mind the edges of the pancakes are perfectly round but the rings (of sauce? Maple syrup?) I’ve kept irregular as it seemed fitting.

I hope to be able to give more updates on this project soon as I’m very keen to move on to the texturing stage. That’ll be what’ll really make or break the piece.


Side Project- Making a Mechari Head Prop

It’s probably going to seem like I’m writing an awful lot here for just a side project, but there’s a lot to say since I actually started this project over a year ago, just as something different to do in my free time. I was taking a lengthy break from the aforementioned MMO to ensure I wasn’t distracted from my 3D work. I have a particular love for the design of one of the playable races, the Mechari, so at the start of this break I decided it would be fun to start making a wearable version my character’s head as a more unusual fanart tribute and in the future maybe even as part of a costume.

If I wanted the piece to be wearable I had to make a lot of adjustments to the design. After finding model rips of the characters the first step was to put together the different facial elements to match my character, then make sure all the verts were welded- it turned out there were a lot of holes so this step took a surprisingly long time, and that’s without including having to cut and stitch together intersecting pieces. The actual adjusting to fit my head was an interesting process. Getting the shape right actually involved bringing in a self-portrait piece from my second year of uni and then stretching out the back plate of the head to try and fit around the head shape.


The next step was importing the model into a program called Pepakura, making sure the settings preserved the scale. It unwrapped automatically, but of course this was an unusable mess so I had to cut the pieces to be easy to work with myself. Since Pepakura is designed for papercrafts it adds tabs automatically, and is a very simple program to use. It’s not very expensive either so I recommend it.

So with all the pieces printed on thick card, I was all set. I worked on and off the project over my final year at uni, and then rushed to finish the main piece once summer rolled around.

The reason for this is that to reinforce the model you need to use resin, which loses heat if applied in thin coats and therefore needs a decent temperature to cure. From what I’ve done already I’ve had problems with not getting the ratio of hardener right which causes the same problem. It would be helpful if the packaging used actual units so I didn’t have to guess- centimeters per milliliter? Is that cubic centimeters? Centimeters up the container? Centimeters of the line squeezed out of the tube?!


 But that’s more or less as far as I have gotten at this stage, I’ve just made the mandibles so I can coat them too. The real challenge will be coating the inside with a mix of resin and car body filler, and then doing the same to the outside to sand it down. I’ll probably give more updates on this project at a later date, but it’ll depend on how the impending cold weather impacts things. Bring back the heatwaves, I wasn’t done with them.

--

This post turned into a bit of an essay but I thought it would be good to start with everything up-to-date. I’m not estimating a schedule for posting as living at home again has proven to slow things down considerably, but I’ll be doing what I can. It’s all about staying positive and continuing to improve!